‘Dune: War for Arrakis’ Board Game Review

In Dune: War for Arrakis two to four players will control the opposing forces of House Atreides and House Harkonnen as they do battle to control the desert planet. Played over a series of rounds and lasting about 3 or 4 hours, Dune: War for Arrakis is actually best played by just two people. This is partly because of how long it is, but also because it’s a game of decisiveness and control, which isn’t always compatible with systems that drive joint decision making.
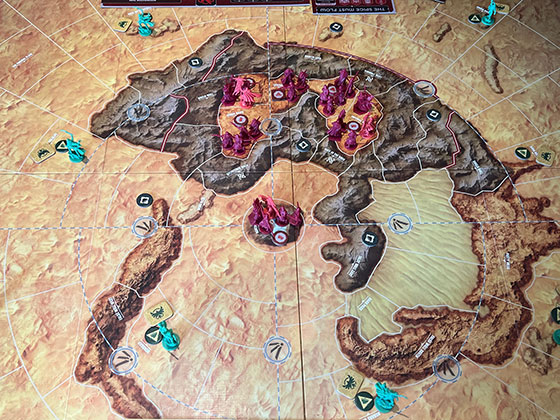
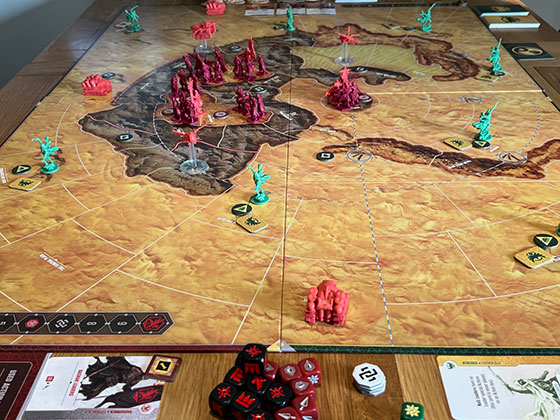
Dune: War for Arrakis is massively asymmetric, with each of the two main factions having very different win conditions, and necessitating very different play styles. Under constant pressure to produce more and more spice, the Harkonnen player will need to delve deep into the desert – exposing their forces to sandworms and sandstorms or risking the consequences of various embargoes. Meanwhile, the Atreides player moves freely and rapidly across the land, but with their small, limited forces holed up in Seitch Cities that must be protected, pitched battles can be impossible to recover from.
If this sounds at all familiar to anyone, Dune: War for Arrakis is actually somewhat similar to War for the Ring – an equally epic head-to-head game from the same designer (Marco Maggi) – and whilst I wouldn’t go so far as to say that it’s a remake, the similarities are very clear. Dune: War for Arrakis also seeks to tell a massive story in just the course of a few hours, and I have to say that it does a really, really good job – there are mechanical and thematic tie-ins that bring the world to life, and the way the two sides act and interact is often just fantastic.
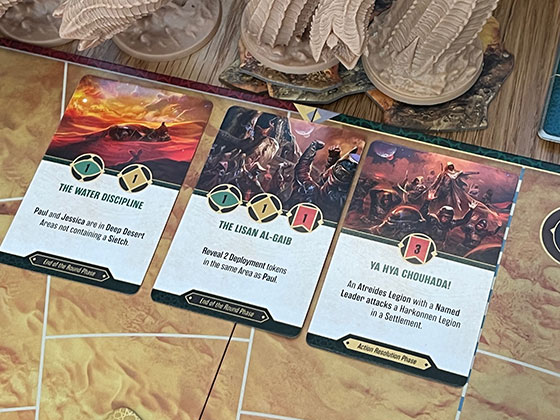
As mentioned, both sides need to achieve very different things – for House Harkonnen, the objective is simple. For the Baron and his unpleasant cronies, the win condition is simply to achieve dominance over the planet which is done by moving up the supremacy track. A few things add to Harkonnen supremacy, but destroying Fremen Seitches is the main one, and each Seitch is worth between one and three points for the Harkonnen. For the Atreides, an objective card is dealt at the start of the game and this will give the Atreides player a total of eighteen points to seek across three different symbols – and this is kept secret from the Harkonnen. Thematically, these symbols represent the people of Dune, the power of the Bene Gesserit and so on.
House Atreides points also come from destroying buildings belonging to their opponents (specifically cities), but these can be hard to reach and as I mentioned before, outright conflict is not the Atreides strength. Instead, the Atreides can also get points – known generally as prescience points – by completing cards that are drawn each round (also objective cards, but not the main objective card that sets the total win condition.) These cards will provide a small handful of prescience points (perhaps one for each symbol) in return for doing something in this specific round – for example; having two armies in a specific sector, or having two named leaders involved in a battle.
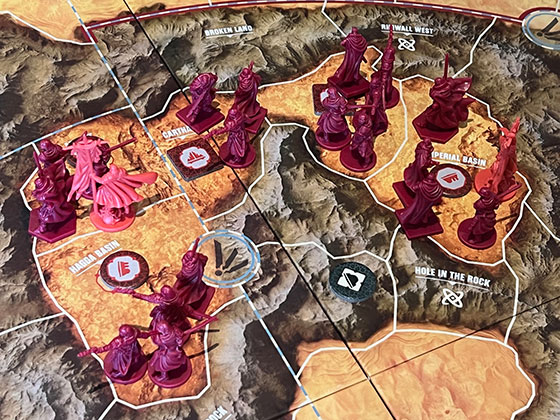
There’s a feeling when playing Dune: War for Arrakis that House Harkonnen is easier to play, with a more passive approach to the game that is easier to pick up than that of the House Atreides, who really need to be played efficiently and aggressively if you want to succeed. Whilst most new players seem to gravitate towards Atreides, I’ve found that it’s much easier for me to teach the game if I ask the learning player (s) to act as Harkonnen. On that note, in three or four player games, the additional two players act as allies to the main factions – taking on the role of House Corrino (for Harkonnen) and the Fremen (for Atreides) but components, victory points and turns are shared.
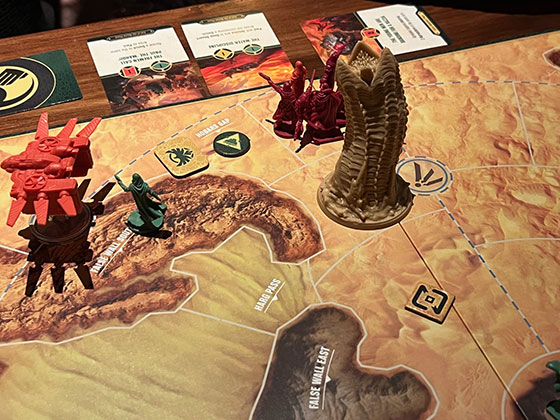
So with all that said, let’s talk about how Dune: War for Arrakis actually plays. For the Harkonnen, each round begins with the placement of vehicles – including spice harvesters, thopters and carryall’s. How many of these you will place depends on where you are on the spice track – and if spice collection is going well, you’ll receive fewer vehicles but more action dice (which I’ll discuss later.) Should spice collection begin to tail off (which it probably will) then the Emperor will respond to sending more vehicles to your cause – albeit at the cost of both losing action dice (which is bad) and potentially suffering from one or more embargoes that make Harkonnen actions weaker.
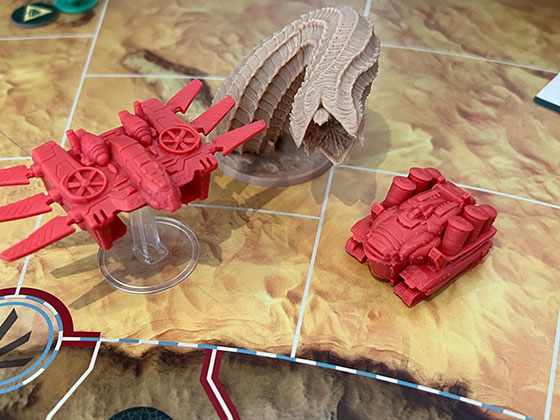
Vehicle placement is critical for the Harkonnen, as each vehicle plays a role in their success during this round specifically – and as above, that might set the tone for the next round as well. Harvesters collect spice, but only following a full round of turns. This is important to know, because whilst you’ll place one before the round (on either a desert space for one spice, or deep desert for two), you have to keep it alive for the full round in order to collect anything during the end of round phase. Harvesters are defenceless on their own, and easily killed by either Atreides legions or sandworms. Thopters can be used to help Harkonnen legions move faster within their zone (but only once per round) or to scout Seitch’s, whilst carryall’s can be used to rescue one harvester in their sector, but only under a specific set of circumstances.
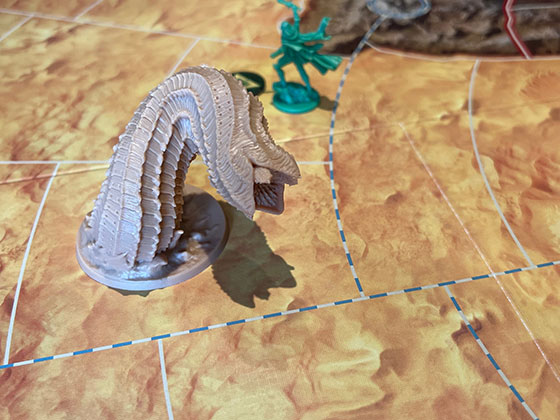
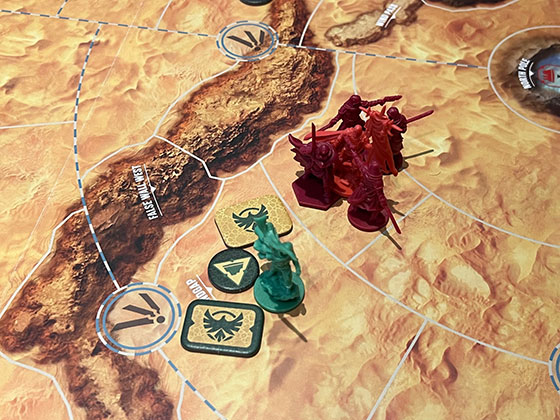
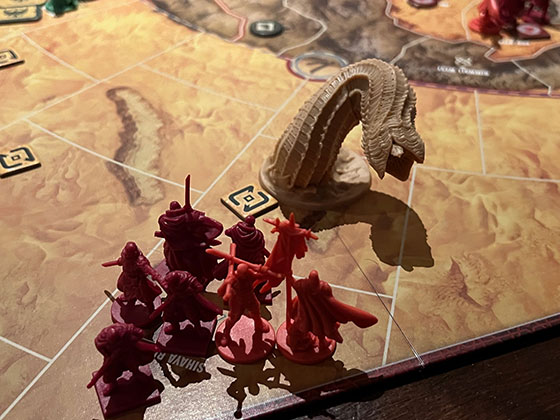
Vehicle placement offers the Atreides an opportunity to disrupt Harkonnen plans, so of course the Harkonnen wants to stay as far away from active Atreides legions and Seitch’s with hidden legion tokens – but in any case, the Atreides player has ways to add “wormsign” tokens to the board, which can either summon a sandworm later or create fast-travel for Atreides legions, where thematically those legions simply ride the sandworms across the wormsign tokens to reach distances that are much further away than normal movement would allow.
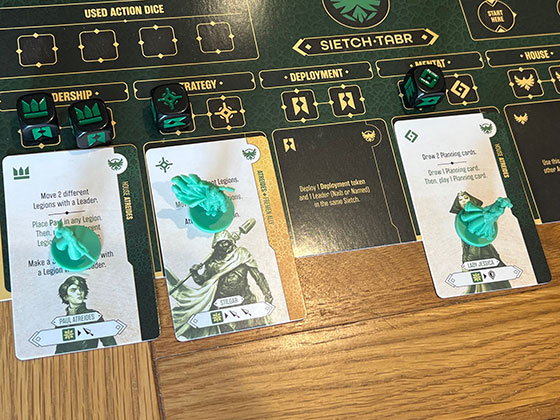
After vehicle placement, players will each draw a card from both their house deck and the house deck of their ally (one each from Harkonnen and Corrino for the Harkonnen player, for example) unless you are playing three or four players, in which case, each player representing a faction or ally will draw one card from their deck only (or both decks if you are playing as one side against two players on the other, in a three player game.) The cards offer powerful abilities – sometimes enhancing existing actions, sometimes introducing named leaders, and sometimes doing something completely different – when played.
Next, the action dice are rolled and placed. Without getting too into the detail here, each player simply rolls their dice and then places them on the matching spaces on their player mat. In a multiplayer game, dice are divided as equally as possible between the players, and sometimes wild or excess dice will be rolled, in which case these must be reassigned to empty spaces on the mat based on whatever section has the least dice in it. Atreides begin the game with four dice and Harkonnen eight, however the Atreides can always take a desert action as long as they have fewer dice than the Harkonnen side does.
These dice are used to drive actions during the main phase of each round – with a die being spent to do whatever the action below states. This might be move two legions, recruit two legions (for the Harkonnen only), draw two more planning cards or similar. These actions are made more powerful by having named leaders in play, with each named leader aligned to a set action and coming with a card that will cover the basic variant of that action. Players can also discard any dice in order to simply play one of their cards, and this might be well worth doing depending on what cards you have – an assassinate card, for example, might remove a named leader from a specific army, which could either disrupt plans for an upcoming battle or perhaps even remove the chance to score one of those objective cards I mentioned earlier.
Once all action die are spent and the players end the action round, the desert hazards phase happens. During this phase, wormsign tokens are placed on any space with a Harkonnen legion or harvester, then all tokens are flipped to reveal sandworm attacks (which are then resolved.) Sandworms placed in this phase actually stay on the board to the next round, becoming controllable by the Atreides player and acting as a powerful legion in their own right – albeit one that must remain on sand and cannot enter the Harkonnen’s protected inner locations. Harkonnen can also uses its carryall vehicles to rescue harvesters in the same sector (during this round only) if applicable. Lightning storms then occur, potentially damaging all Harkonnen legions that are outside protected areas.
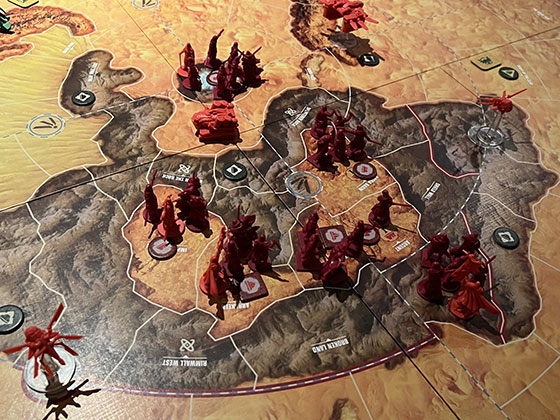
Dune: War for Arrakis wouldn’t be much of a war without some fighting, and when an attack is declared, it’s also dice-based and thankfully relatively quick to resolve. Each side can have up to six units (basic, elite and super elite) in a single area at once, plus any number of leaders (either generic or named.) Each unit adds one dice to the attack, but super elite units negate one enemy shield, and leaders may add shields or hits, or do something unusual when a special die is rolled – so these augment the die roll, rather than actually adding more dice to it. Both sides roll the dice and compare results. Hits (after positive modifications and shields have been dealt with) then deal wounds – which can be counted off by removing leaders or basic units, or by “ticking down” elite or super elite units to the left below. Combat continues until one side is either wiped out or chooses to retreat.
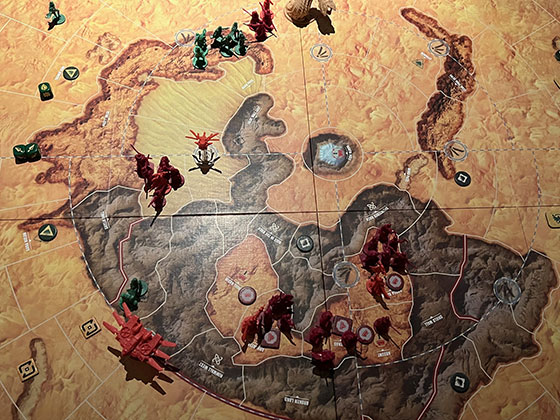
And this is how Dune: War for Arrakis plays out. The round is setup with Harkonnen vehicles hitting the ground and new Atreides objectives being dealt, then with each player rolling action dice and taking the actions in sequence. Combat occurs often, but it is by no means the only way in which the Atreides can win, and any successful Atreides player will need to be quite cunning in order to outmanoeuvre the Harkonnen. Liberal use of wormsign tokens to help the Atreides move closer to the key board locations is essential, but there’s also a need to ensure that the most important Seitch’s (the level two ones for sure, but most definitely the threes) remain protected as best as possible.
There isn’t much that I don’t like about Dune: War for Arrakis thanks largely to its superb design, excellent use of the IP and really tight gameplay despite so many asymmetrical elements. It is undoubtedly better at two players than four, but you know what, I have played it multiplayer and I really enjoyed it all the same. This is a game with lots of small rules and bits of what I might call “fiddliness” but despite that, the teach is clear and the overall objective for each side is simple enough to drive players through all the smaller rules. The components are the usual CMON quality, with a board that is perhaps even a little too large, but then a load of lovely miniatures (including huge sandworms) with which to fill it. A fantastic, must-try game.